CLICK HERE FOR FREE BLOGGER TEMPLATES, LINK BUTTONS AND MORE! »

Tuesday, May 8, 2012

SUN~DAY FUN DAY!


Yesterday was a very nice day and Brandon had the day off but he made plans with his buddies to go to the Kuna Caves so I decided to take the kids to Settlers Park where we spent a few hours in the sun they played ALL day. After the park I headed to Burger King to see if they had chocolate soft serve and they didn't but they did have an indoor play spot so we hung out for 10 min and headed out. I decided to hold off on the ice cream and make a quick detour to WAHOOZ the kids were beyond excited and when we got there I let them know we were going to play a game of mini golf....it was a blast and the weather was AMAZING I just wish we could have had some company Paiton was sick yesterday so the cousins couldn't come and and daddy was getting a much needed bro date hahaha. Here are some pictures of our day.

The boys playing mini golf


My little lefty could not figure out why he couldn't hit it righty but overall did great once he got the swing of it *literally*


Look at those curls I get stopped every where I go because of his beautiful hair...us playing ball


Cadon waiting for mommy to throw the ball. I can NOT get over how old he looks in this picture he is such a stud muffin.

Practicing with his coach *DADDY* who literally will be his t ball coach 


The boys woke up bright and early and asked to go to their friends house so they spent a few hours with their friends!!


Ready to golf!


My little mini me 


Sunday, May 6, 2012

FAMILY PICS

I want to start getting back to blogging about my family. I started this blog so my family can see what we were up to and see pictures but I started crafting and stopped posting so here is a post of all the pictures from my phone from the past month!


Yesterday was Quinn's birthday and Brandon and him were Lady And The Tramping with goldfish


I took the boys to the park so we could practice playing ball and this is Ryan running to Home Base 


Hanging out in the car with my buddy

The hubby and I 

My nephew Quinn and I 

We had a garage sale and Cadon my oldest is so crafty he asked his Nana Lurcook for a straw,paper and marker so he could make us a sign to show people where the garage sale was!! IT WAS SO CUTE 


Cadon is in love with his nephew Quinn and it was the first time we had seen him in about three months so he smothered him with loves and even got to sit with him


Ryan is showing me his puppy dog face 


The BEST big brother in the world giving his baby brother a boost


Ryan decided he wanted to be a baby again and sat in the bumbo to eat his food


After a long day of school Cadon fell asleep and Ryan snuggled him like crazy


My niece and I 


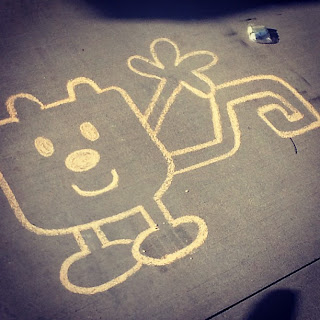
I took the kids outside to play with some chalk and I drew them a big WOW WOW WUBBZY 

Cadon swinging with his friend from school and Ryan

My nephews little tiny toes 


The boys hanging out on the ship mommy made with chalk

Cadon and Ryan


Ryan pitching the ball to Cadon

Cadon my Baseball player


Hanging out 

Quinn's mouth while eating his birthday cake


Today I took the kids outside to play and this is the kids walking to their friends house to play

The garage sale was tiring so the kids took a "pretend" nap on the lawn


Hubby and I 

Brandon wanted to burn the Christmas tree we never disposed of from two years ago YES TWO YEARS and spend time with me outside while the kids slept

LOVES

My little BOOGER and I 


Well that's it for now I will be posting more from now on.


Thursday, May 3, 2012

Charm Bracelet Tutorial


Charm Bracelet Tutorial
Mothers Day 2012 

You will need:
1.A Charm
2.Scissors
3.All In One Jewelry Tool (round nose pliers)
4.Cord
5.Jewelry Wire
6.Button


Step 1.Take your wire and at one end create a loop *as pictured above* then slide the wire through the middle of the charm once you have done that repeat the first part and make a loop on the other end.


Here is how step one should look like after it is completed and for those wondering the gauge of the wire I believe it is 18 but use what ever works with the charm you have.


Step 2. You want to now cut your cord for the project I like to wrap the cord around my wrist twice then cut after that is done slide your charm to the middle of the cord.


Step3. Take your bracelet and place it around your wrist and with the other hand slide the button onto one end of the cord and once you find the place you want it to be tie a double knot and pull it tight after that clip any extra cord with scissors.


Step 4. Take the bracelet and wrap around your wrist again take the untied end and wrap it around the button you want enough room for the button to pass through but not to big to where the button will fall out and when you you created the loop you will tie with a double knot and clip extra.


YOUR DONE!! 


Here is a picture of how the bracelet should fit


And here are the beautiful bracelets I have created I hope everyone enjoys this tutorial and if you have any questions feel free to leave me a comment and I will answer as soon as possible!


Wednesday, May 2, 2012

Mothers Day Tutorial


and here is the link!


Today I was working on Mothers Day gifts for  my MOM,mother in law and sister in law's. I ended up making this BEAUTIFUL bracelet and  I will be making a tutorial for this amazing charm bracelet tomorrow so stay tuned and be sure to leave a comment and let me know what you think!

Tuesday, May 1, 2012

Heart Ring Tutorial


I know I have been a horrible blogger but this is sure to be one of the sweetest tutorials ever. I saw this ring a year ago on Pinterest of this gorgeous gold heat ring it was so simple and elegant but they wanted a whopping one hundred dollars and it was from a fine jewelry store so that might be why it was so expensive but I put it off into my if I win the lottery I can't afford section of my mind until I stumbled upon a tutorial for a wire ring and around this time last year I didn't even know how to make jewelry so with my new knowledge and my supplies I went to work I had this beautiful ring done in about 20 min!!!!!!!!! 


The best part of this DIY is it cost me nothing to make.